At a time when we cherish convenience, the appeal of achieving a professional-looking blowout at home is undeniable. Whether it’s about saving some cash, avoiding choked-up salons, or simply taking complete control of your hair care, the desire for expert-level results without setting foot in a salon resonates with many of us.
That said, despite the seemingly effortless blowouts created by professional hairstylists, achieving top-notch results is far from a walk in the park. There’s a reason why they’re experts and you’re not. For those who have tried replicating blowouts at home, the struggles with tugging, tangling, and strain on the arms make it a challenging process.
Thankfully, there’s a way to make your styling easier and look more professional. As such, this post guides you in achieving blowout brilliance, outlining some steps and products that bring salon-quality results right to the comfort of your home.
Why You Need a Blowout
Have you ever wondered why some people swear by the magic of hair blowouts? I mean, if you break it down, it’s essentially washing, drying, and styling – nothing too fancy, right? Well, imagine starting your hair routine with a messy bun and ending with luscious, flowing locks; that’s the power of a blowout. Getting a professional blowout is a complete makeover, instantly adding volume and bounce to your hair from root to tip.
For those battling stubborn strands or frizz, blowouts ensure your hair stays on its best behavior and remains healthy for days. What more? Hardly anyone has the time to style their hair every single day; as such, you can enjoy the beauty and confidence boost of a professional blowout for days on end.
How to do a Blowout at Home
Not wanting to go to the salon shouldn’t be a reason not to explore the brilliance of a professional blowout. In hopes of making at home blowout more attainable for everyone, we provide a comprehensive guide to achieving quality blowouts from the comfort of your home.
Wash Your Hair
Every perfect blowout result begins with a good wash with a shampoo and conditioner; after all, it takes wet hair to be blown dry. The hair products you choose impact the blowout result significantly, so be sure to opt for one formulated to address specific hair types and concerns, from frizz to volume, split ends, and color-treated hair, to mention a few.
It’s also good practice to wash your hair with an alcohol or sulfate-free shampoo and conditioner. Furthermore, some hairstylists suggest applying a deep conditioning hair mask for very tough hair to revitalize the hair and make it softer and easier to style.
Prepare Your Hair
Once you’re done washing your hair, it’s time to get it on point for serious heat styling. The first process is to remove excess moisture. While blowouts depend on heat, too much exposure to heat can cause frizz and damage the hair over time.
Removing excess moisture helps to speed the entire blowout process by minimizing the time your hair is exposed to heat, and, for those who have tried at-home styling before, significantly reduces the stress on your arms and elbows. In summary, do not blow dry sopping wet hair.
Obviously, super-absorbent microfiber hair towels are the best option for drying the hair. Not only do they absorb more moisture, but they are also more gentle on the hair compared to traditional cotton towels.
Finally, take the towel off and comb through the damp hair. Some people prefer a detangling brush, while others opt for a wide-tooth comb, depending on the hair type and personal preference. Whichever you choose, take care to straighten the knots without tugging excessively.
Use Heat Protectant
The essence of the second step is to reduce excessive moisture and detangle the hair. Once both results are achieved, you should protect your hair from possible adverse heat effects with a heat protectant. We’ve seen the impacts of overexposure to heat; as such, protecting the hair from heat is just as important as every other step in the blowout process.
Typically, heat protectant insulates the hair’s cuticle, creating a protective barrier to prevent breakage from heat. For those with color-treated hair, it can also maintain its health and color. Like other hair products, the ideal heat protectant depends on the hair type and texture. For instance, lightweight, oil-based sprays are suitable for fine and thin hair, while thick, coarse hair would benefit better from creams or serums.
Blow Dry
If you frequent the salon, you’ll notice hairstylists tend to style the hair when it’s almost dry. This process is more straightforward, retains the styling, and reduces the risks of breakage. Before you start styling, blow dry your hair on medium or low heat until it’s about 70 percent dry.
Finally, to the most crucial part, blow out small sections of your hair with a round brush using the “pull and roll” technique. This technique is the secret to achieving a good volume, bouncy, and smooth hair.
Begin by planting the brush at the hair’s root and tightly work it into the hair. Then, blow dry the section and slowly pull the brush toward the tip of the hair. As soon as you get to the tip of the hair, spin the hairbrush back towards the root and pull towards the tip again, all the while using the hair dryer to follow along. Continue the process until the section is completely dry.
To lock in the style, hair stylists suggest letting the hair cool. You can quicken the process by blasting the hair roots with cold air before repeating this blowout style in another section. Remember, the smaller the section, the better.
Choosing the Right Blowout Tools
The products you choose are just as crucial in achieving professional-level results as the steps we’ve listed above. So, what products and tools should you use at home for a salon-worthy blowout? Here are some of our recommendations.
Blowout Heat Tools
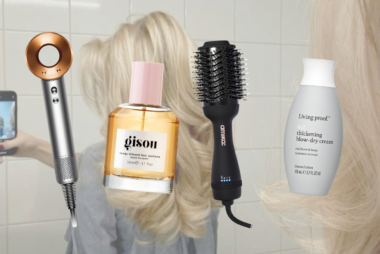
These essential gadgets turn a regular hair day into a fabulous salon-worthy blowout. They work to create volume, smooth, and bouncy hair. Suppose you’re looking to master the art of at-home styling. In that case, we recommend hair dryers like the BaBylissPRO Blow Dryer, the Dyson Supersonic Hair Dryer, and the T3 Cura Professional Digital Ionic Hair Dryer.
Aside from hair dryers, you can also explore round brushes, curling wands, and flat irons. The Dyson Airwrap Styler, T3 Hot Rollers, and the Amika Round Blowout Brush are other ideal blowout heat tools.
Blowout Non-heat Tools
Unlike heat tools, these help prepare, style, and finish your hair without subjecting it to the heat of traditional blowout tools. Non-heat tools include detangling brushes, wide-tooth combs, volumizing hair brushes, sectioning clips, velcro rollers, and hair towels, all playing specific roles in achieving a fabulous professional-look blowout.
Some of our recommendations for blowout non-heat tools include the Drybar Full Pint Medium Round Brush and High Tops Self-Grip Rollers, the Wet Brush Pro Paddle Detangler, and AIDEA Microfiber Hair Towel Wrap.
Most non-heat tools are interchangeable; however, this isn’t the case for brushes, and it’s expected for beginners to make mistakes when selecting the best one. Typically, whichever you choose should depend on the blowout style you want to achieve; for instance, you can achieve a nice lift at the roots with a big round brush if you have long hair. On the other hand, small round brushes are better suited for people with short hair.
Blowout Hair Treatment and Preparation Products
Finally, a perfect blowout begins in the shower, making hair treatment and preparation products extremely significant. Products like the Kerastase Discipline Sulfate Free Shampoo and Conditioner, Living Proof Full Thickening Cream, and the Gisou Honey Infused Hair Perfume help moisturize, hydrate, and strengthen the hair shaft while also reducing breakage.
If you’re battling frizz, check out IGK’s Good Behavior Spirulina Anti-Frizz Smoothing Spray or the Briogeo Blow Dry Heat Protectant Cream effectively protects from overexposure to heat.
Ultimately, these blowout products go beyond aesthetic appeal. They emphasize functionality while prioritizing your hair’s strength, health, and longevity, ensuring sustainable blowout results. Selecting any of these products based on your hair type adds an extra layer of hair care, making the blowout experience effective for beauty and health.
Blowout Mistakes to Avoid
While most of us may seem unsure about our ability to achieve a salon-worthy blowout hairstyle at home, the process is surprisingly simple. All you need are the right tools and patience. It’s also important to know what not to do when styling your hair at home.
A common mistake most people make is over-twisting the brush at the hair’s root, causing tangles and breakages. To avoid damage and dryness, you should also avoid holding the dryer too close to the scalp. Stylists recommend creating an inch distance between the dryer and your hair.
Ultimately, patience is required for a great, frizz-less blowout. As we said, the smaller the section, the better. The blowout process is methodical; as such, take your time and gain better control of the process and outcome.


